Project SKIPPER – The Hole Conundrum
Welcome back! My apologies for the epic delay in getting this out, first a few things in life got in the way. Then the new Hitman game came out! And we all know how much I love a Hitman game.
Before we crack on let us have a little recap on what’s gone down so far. In a nutshell I have completed step one in my 3 point plan – wire controls up to Pi. Now I have to conquer step 2 – build a cocktail cabinet. How hard can that be? Turns out extremely hard, that’s how hard that can be.
When you look at a cocktail cab it does not appear to pose all that much of a threat. It is essentially a rectangle with a wider lid and a control deck on each side. With this in mind I drew up some plans and went to buy some wood.
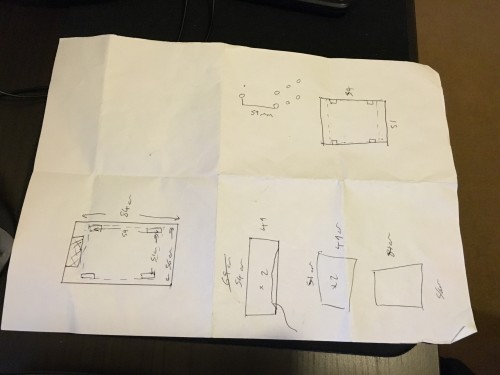
I opted for a large sheet of MDF and got the kind man in the shop to cut it into manageable chunks using his massive wall mounted saw. This was all going to plan and no sooner had the ink dried on the plans, the wood was loaded into the car and transported to my Dads garage. This is where I started to struggle.
You see. When you look at a cocktail cab it does not appear to pose all that much of a threat. It is essentially a rectangle with a wider lid and a control deck on each side. That’s a rectangle with a wider lid that has a monitor smack bang in the middle of it! I was not entirely sure how I was going to cut the hole out of the top to house the monitor. Let alone how the bloody hell I was going to mount the damn thing into said hole. I took to the internet for help. After many images of women in various stages of undress, I found the answer. There is a bracket used to mount LCD monitors into racks. It was perfect! Not only would it mount the monitor where I needed it to be, it was as simple screwing three bits of metal together and bolting them into the top. All for the bargain price of £20.
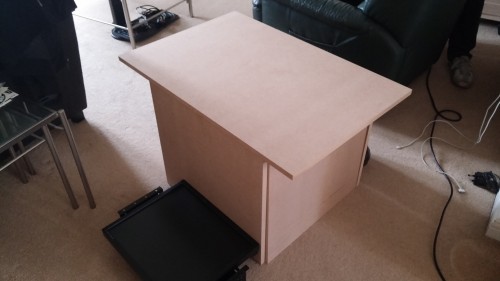
Now I had to overcome the hole conundrum. The done thing here would be to take your plunge router and plunge route a nice monitor shaped window bang in the middle of the lid. One problem – I don’t own a plunge router and those puppies are not cheap. Even if I did own one of the plungey little bastards I sure as hell have no idea how they work. This left me with no choice but to drill out each corner of the window and take a jigsaw to it. Here is where my utter lack of woodworking came shining through. No matter how hard I tried I just could not cut lines as straight as I needed. This was causing a major issue. If I wanted to achieve that “bit of furniture” look I was aiming for, there had to be another way.
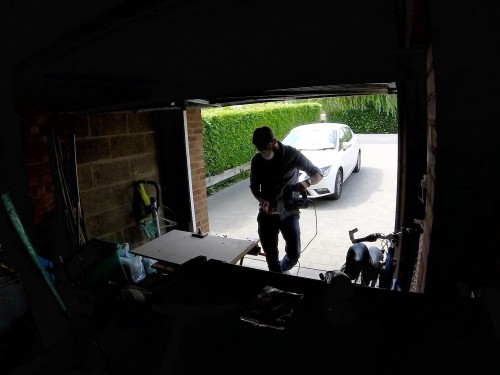
Many months passed. With every failed attempt my wood handling powers increased but I was still falling short of the finish I was so keen to achieve. As the summer gave way to autumn I had managed to produce as close to a perfect top and two control decks as I was ever going to craft with my own two hands. It was still shockingly poor and I was beaten. As I sat in defeat, looking to buy a cabinet off eBay, I stumbled across a lifeline – Plans. Plans that would allow a machine to cut the wood to glorious perfection, lines so straight you could use them to test the straightness of other lines, or something.
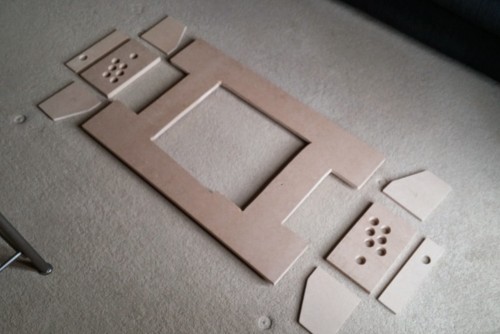
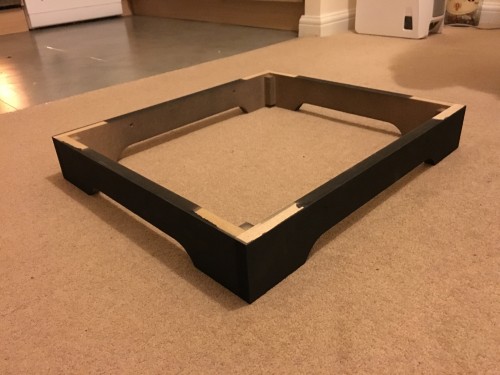
It turns out a CNC milling machine is quite a beast. As you would expect they are expensive and not all that easy to buy. It was now late November and I was deep into the hunt for a man with the right tool to satisfy my wood based needs. As luck would have it the husband of a friend knew just the fella. He hooked us up and we met in a bar to discuss the idea. Huddled over a laptop we revised the plans a little and agreed that it could be done. The MDF was swapped out for black vinyl wrapped chipboard, an access hatch that would also house the coin mech was added and we were away. Come early January I had all the parts I would need, even a cool little plinth thing that would add to that quality finish.
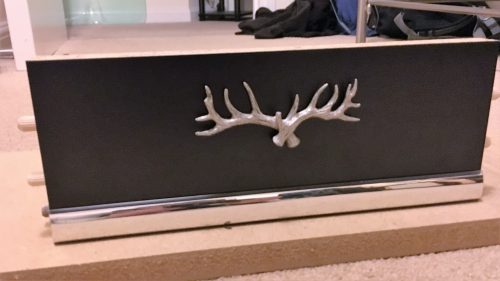
With the machine having done all the hard work I set about mounting the speakers, coin mech and antlers. Yeah that’s right – antlers. The monitor was bolted into its perfectly sized window using the £20 bracket and all the t-moulding edges were glued into place. The edges then all pinged out and where re-glued back into place. This happened more than once. I ordered a Perspex top and it was time to see if it would all go together. Things were progressing so well that I even started to think about the decoration.
To Be Continued…

Project SKIPPER – The Beginning
Growing up I was lucky enough to be surrounded by technology. Between my Electrical Engineer of a Father and my highly technical, and somewhat nerdy, Grandfather I was granted detailed access to everything from arcade machines to CB radios and more.
As I got older my friends also contributed to the mix. We set up LANs for gaming, messed about with software applications and built many a bad-ass gaming PC. We also made a circa 300 mile round trip to pick up the shell of an old arcade machine – then we made it work again before turning it into a monster MAME rig!
One of my earliest memories of tech is when Grandfather (or Pappy as he was known) produced a PONG games console. Now I can’t be sure if he made the thing from scratch or not, but to 4yr old me it was the best thing ever. In my mind he had made the whole thing and was a computing God. We tuned it in to the TV, set the paddles so the ball wouldn’t fly clean through them and got our game on. To this day I can still vividly recall the strange hammered green metal that housed all of the electrical innards. He is the reason I own a Binatone TV Master 10. It is not even close to an original PONG machine but it reminds me of that day.
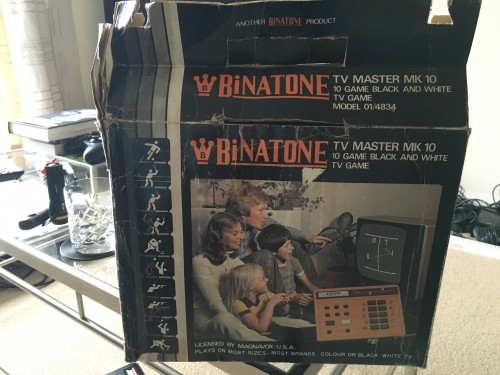
It is the experiences outlined above that led me to where I am today. My ingrained interest in technology led me to the Raspberry Pi. Mix that with the engineering input from my Pappy and my Old Man, throw in the countless projects completed alongside some of the greatest men in history and there was to be only one outcome
A Raspberry Pi Powered MAME Arcade Machine!
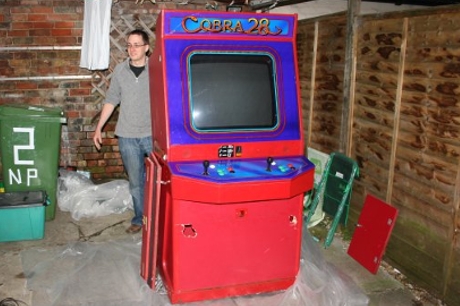
This couldn’t be your usual upright style of arcade machine. We already have one of those in the collection thanks to Fen and the epic drive to Manchester– You can read all about that here. Despite wanting an upright of my own since the day we started on Fens I could not bring myself to build one. I had to push my limits. I had to build a cocktail cabinet – from scratch!
I was convinced that if I split this up into 3 stages I could get it all done in around 6 months. My plan was simple – 1 wire controls up to Pi. 2 build cocktail cabinet. 3 place Pi in cabinet. How hard could it be?
I got off to a good start and ordered up a Raspberry Pi 2 Model B. It was not long until I had it playing all the old classics. This was all down to PiPLAY. A super cool package that allows you to get MAME up and running on a Pi with minimal effort or knowledge of Linux – Double win!

With a working instance of MAME in place I moved on to the controls. Fen had been kind enough to gift me an I-Pac board that would map the inputs from joysticks and buttons to keyboard inputs. This meant all I had to do was wire in all the micro switches to the correct places. Simple – right?
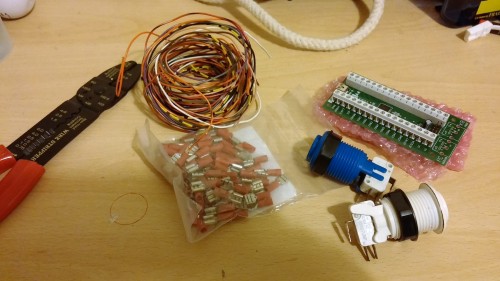
Well – no. Once I had got hold of the right sized spade connectors it was pretty easy to wire all the buttons and joysticks up to create some working control decks. The I-Pac was preconfigured to work in MAME so all the button press combinations to select games and the like were all ready to go. Ross was kind enough to risk his sight (and life) as I got to grips with drill bits that cut big holes in wood. It was not long until we had a working test board in place. The problems came with the coin mech.
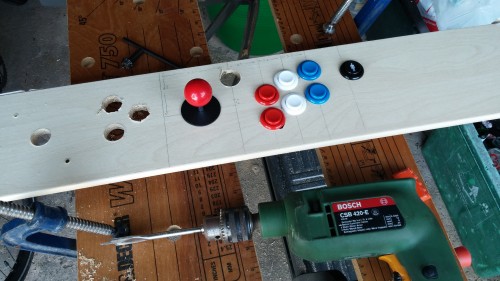
I really wanted this machine to be token operated and that meant installing a coin mech. My first obstacle was power. The Pi has none. That is not entirely true. You can use the GPIO to get 5v but I needed 12. This lead nicely on to obstacle number two – The I-Pac took 5v input signals and the coin mech pumped out 12v. Not ideal. I tackled the first issue by wiring the mech up to a 12v power adapter I had lying around the house, I think it used to power an old router. Next I spent a few hours at my Dads place when he came up with the Zener diode. This little bastard would knock my 12v output down to a more acceptable 5v. A quick bit of wiring later and we were there. Check it out!
So there I was, a few months in and I had a working arcade machine without a cabinet. Feeling pretty pleased with myself I played a game of Donkey Kong, powered everything down, took off my headphones and started to think about wood. Wait a second! Took my headphones off?! Yeah that’s right – I had forgotten about the bloody speakers. The whole time I had been using headphones plugged directly into the Pi’s 3.5mm audio jack. You can’t be playing in headphones! This needed to be addressed, and fast!
Now I confess, I did make this part a little more difficult then it needed to be. I have a pair of old Kenwood S-62 speakers that used to belong to Pappy. The amp that used to drive them had recently gone to the great WEEE recycling centre in the sky and I was just itching to find a reason to reuse them.
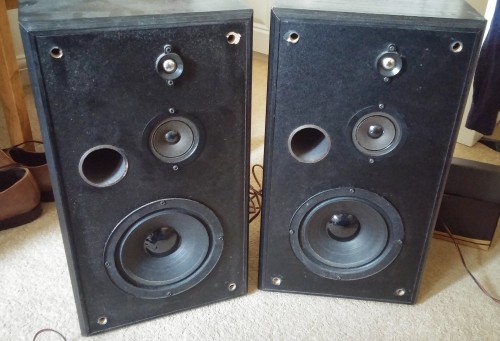
My problem was getting these two 70w speakers into the cabinet and running off the 3.5mm audio jack. The audio out on the Pi is unamplified so the speakers were virtually silent when rigged up. Even when connected to an amplified source, an MP3 player, they were still too quiet. If I was going to use these speakers I was going to need a small, efficient and powerful amp – Time for another trip to my Dads kitchen.
It turns out compact and powerful amps are not cheap. However, if you are willing to get your solder on, you can build a conveniently tiny and powerful one of your own. So that’s what I did. To be more accurate I should say – After popping a few capacitors and melting the odd bit of PCB, that’s what I did.
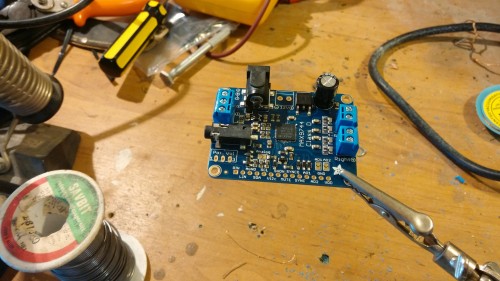
With this little baby powered up the speakers were plenty loud enough when it came to pumping out that 8bit goodness. Overkill? Maybe. Satisfying? Oh yeah.
So NOW I had all the working parts of an arcade machine I could go back to thinking about wood…
To Be Continued.

The UCHG 2015 Retro-Spective (Brad’s Edition)
BOOM! It’s 2016 people and just where the hell did 2015 go?!
Those of you who care, as well as the more observant of you, will have noticed that I spent most of 2015 doing something other than writing super awesome content for the UCHG. Yes I made the odd appearance in a few videos throughout the year but other than that I went 10 months providing fuck all. “Where were you?” I hear you cry – Well, we will get to that, but first I have some catching up to do on what’s been going down since I was away.
January
They say that January can be one of the most depressing months of the year, they also say that Red Bull gives you wings and diesel cars get good scores on emissions tests… To help with those January blues Fen provided a link to over 200 MS-DOS games to help you fill your days with retro gaming goodness. He is a nice boy.
I also took the opportunity to bring some joy to our viewers, and myself (no no, not that kind of self induced joy) with my newly acquired buddy – Buckley the Pug!

Look at his little dog face!
Buck was the perfect subject for another game of Which is Better?. Pitted up against a copy of Winter Based Activities or Die there was to be only one winner. The grunty little blighter!
February
Little did you know that this would be my last post for the year. To be honest I was also unaware of this fact. I had no idea that the little idea I had floating around the back of my head would grow to such an enormous size and consume all of my spare time!
Before my departure I gave Ross and Fen a good run for their money in the creative department. After taking a week out from life I created the mighty Zapper Lamp
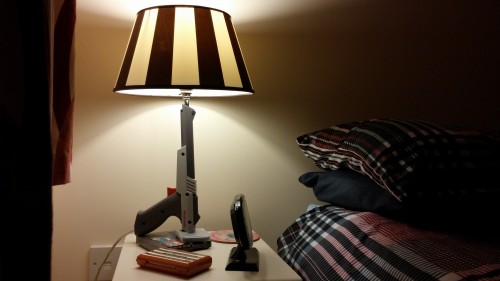
I am still outrageously proud of this despite it’s immense cock blocking powers. No I wont remove my toy gun lamp from the bedside table! Maybe you should leave now….
March (Ikaruga)
As is fast becoming a tradition, only one game was played in March. This year it was down to Ross who got his secret agent on and dispatched many nameless goons whilst completing Counterspy on the PS.
That is all.
April
This happened in April
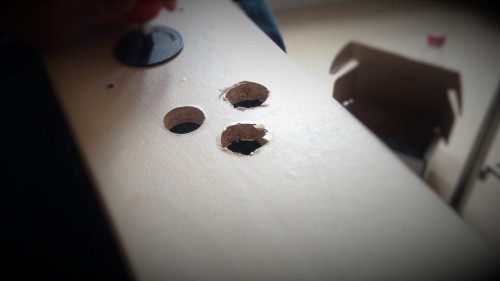
It is exactly as it looks – I drilled some holes in some wood and stuck my knob through them. Why? We will get to that later.
May
Fen could no longer fight the urges and finally filmed himself Beat-ing it. This of course was all aimed at ticking number 94 off the 1001 list and absolutely nothing to do with what you were thinking – you dirty bastard.
Saying that Fen has since been very cagey about leaving his phone unattended…
June
We took an early summer holiday in June. Whilst the rest of the UCHG took a break I continued with the execution of my plan…
July
By the time we hit July I was well and truly gone. My plan was in full swing but I had hit a problem – I needed wood. I needed so much wood I would be unable to get a hold of it all on my own, I needed help. I needed Steve.
On hearing about my desire for some serious wood Steve came up with an idea. Within hours we were in a car park with a back seat practically overflowing with all the wood I could ever want or need. What a friend!

August
Preparations for the first member of the UCHG turning 30 were the focus of August. To celebrate this Fen curated possibly the finest list of LAN games ever seen and suggested we go right back to our beginnings and take this Birthday LAN outside!
The list of games soon grew and as the month drew to a close, after many hours of installing, testing, swearing and patching. We were ready to go.
September
Sadly the weather defeated us when it came to our outside 30th birthday LAN. Due to seemingly never ending rain we were forced to make it an inside affair. It was still awesome!
We also ticked off numbers 98 and 99 from the 1001 with Gauntlet and Gauntlet II.
If that wasn’t cool enough we also hit the hundred on the 1001 list with the mighty SEGA Rally!
October
Halloween – you all know what happens on Halloween. We play Splatterhouse. This year we started Splatterhouse 2 and of course got about half way through before getting stuck. Don’t worry, after the obligatory year’s practise we will be back to take this bitch down!
November
As the winter set in I spent many many hours is a cold workshop with nothing but a soldering iron and rage to keep me warm. After popping a few capacitors I had created this beauty.

It was a key step in my plan, one that would bring me close to its completion, but not close enough.
December
So this is Christmas, and what have you done? – Its all listed above actually, you just skipped down to the bottom didn’t you?
We rounded the year off as it started with Fen offering up more free games. This time it was Shadow Complex and its completion also ticked game 101 off the list. Only another 900 to go!
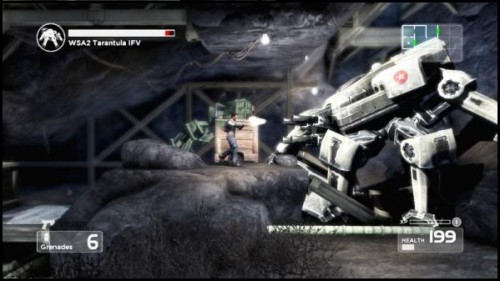
So there we have it, another year down and more games played. “But what of your disappearance?” Clearly I have been up to something. Something big, glorious and hugely satisfying [insert knob joke here].
If the clues above have not tipped you off then maybe you should take a little look at Twitter feed for a few more. You can find us @UCHG2008
All I can say for now is Happy New Year! and thank you for the continued love and support you have shown to the UCHG.
Stay tuned for the great reveal of my plan early this year – you wont want to miss this!
Early Xmas gift… a free game!
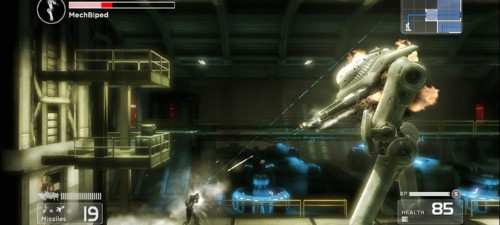
Here’s something to bring joy to the world, or at least our very small corner of it in the UCHG. The new remaster of Shadow Complex is currently free to download – which you should do immediately.
Sometimes the list of 1001 Video Games You Must Play Before You Die brings interesting coincidences and occurrences. This is one of those times.
1001 No.101: Shadow Complex (2009)
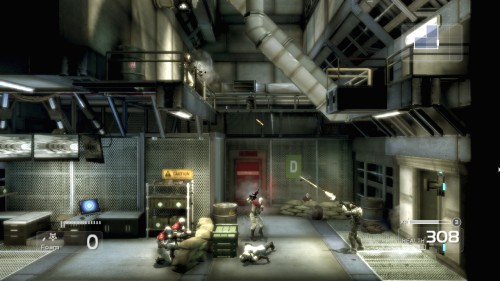
Shadow Complex has been on my list for a while – it sounded ideal, a modern 2.5D shooter which harks back to Metroid days. I would’ve played it earlier, but for one problem – accessing it was a little troublesome, being an online XBOX360 marketplace-only download from 2009. I’ve been putting off any of these type from the 1001, being reluctant to give Microsoft A) any more money, and B) any more personal information than they’ve already acquired already.
So what could be more pleasing to see than the announcement that not only has the game been remastered, but that it is now available on PC, not just XBOX, and that it is free to download until 2016? Grab it here >

It’s a simple game at heart, but is particularly glorious in its simplicity. Controls are fluid, action is constant, and it’s a joy to explore the sprawling, uh, ‘complex’ that contains the majority of the gameplay.
The narrative is silly, at best. You are ‘some guy’, who chases ‘some girl’ into a cave – but not in a Bill Cosby way or anything. What you accidentally stumble upon is perhaps the most ludicrous, implausible and essentially ill-thought out terrorist plot to take over America – which you must of course put a stop to. There is a twist at the end which particularly laughable, in that I actually laughed in its face.
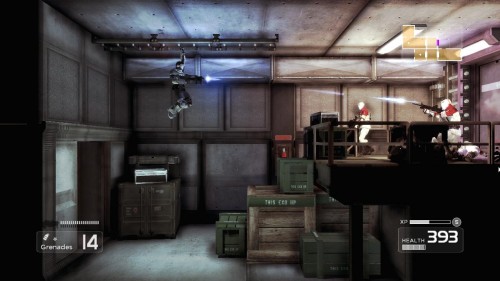
But don’t let that put you off. Shadow Complex is a brilliantly executed platformer, with more than a touch of Super Metroid’s influence. The level of difficulty ramps up as you progress, making it a challenge but never a chore; and as you unlock more abilities, more of the titular complex becomes accessible to you – with each ability bringing more fun than the last.
I put a rocket in a guy’s face, then dropped kicked another off a cliff. What more do you need? It’s free. It’s fun. Go get it.
Splatter-mare on Splatterstreet
Perhaps you thought that we, and Vin/Rick Diesel, were done. Think again. It’s Slatterween for Halloween!
Continuing the famous seasonal tradition of putting a masked Vin Diesel (or is that his real face?) through the horrific trials contained within sprawling and infested mansions, we return to the Splatterhouse.
Is Vin/Rick’s girlfriend still alive after all? Will we even find out? Will this take yet another year? Yes.
Enjoy, and happy Halloween from the UCHG.
